How to move the Microsoft OneDrive folder location in Windows 7
Often folks add secondary hard drives to their computers to free up storage space on their primary hard drives.
As part of this process one would typically move various “data” folders from their primary system drive to a secondary hard drive with a larger capacity.
One such example of this could be moving your Microsoft OneDrive folder and all of its contents from your primary system drive, which is the default install location, to your larger secondary hard drive.
Unfortunately, Microsoft did not make it possible to change the storage location of OneDrive on Windows 7 after you have already installed and are using the application.
Fortunately you can still accomplish this by following a few easy steps that I’ve laid out here: Step 1: Locate and right click the OneDrive icon in your Windows 7 system tray. ![]() Step 2: Choose the Settings option to bring up the OneDrive Settings.
Step 2: Choose the Settings option to bring up the OneDrive Settings. 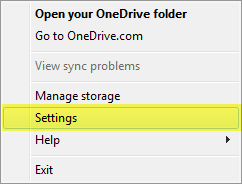 Step 3: On the main OneDrive Settings tab, click the Unlink OneDrive button.
This, as the option indicates, it will remove the link between your local Windows 7 system and the OneDrive service.
Don’t worry; the local files on your computer won’t be removed by going forward with this process.
They will simply, as the dialog states, be disconnected and no longer kept in sync with the OneDrive service.
When we complete the steps below your local OneDrive folder will re-sync with the OneDrive service. 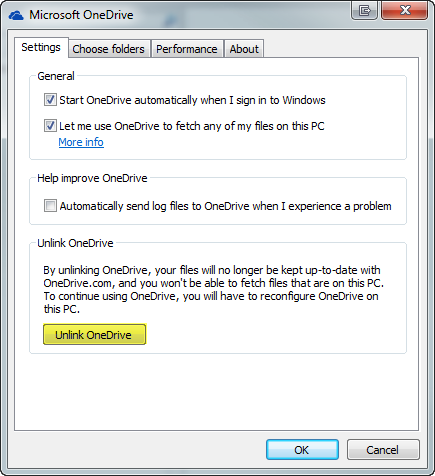 After you successfully unlink your local folder from OneDrive, you will be presented with the OneDrive Getting Started dialog.
Keep this dialog open for now until you move the local OneDrive folder on your Windows 7 system, as described in Step 4.  Step 4: Move the OneDrive folder from the old location on your system to the new drive or desired folder.
The default location is typically C:\Users\<username>\OneDrive.
Move that folder to the desired new location by cutting and pasting.
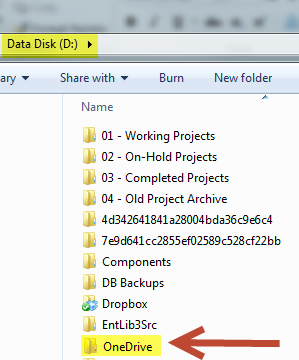
My folder was moved to D:\Data\OneDrive. 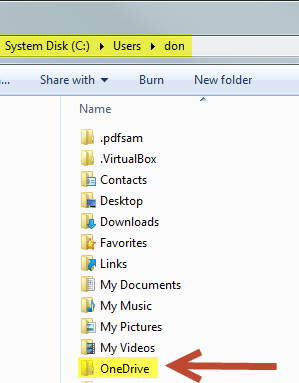
 Step 5: Once you have moved the OneDrive folder to the new destination, return to the OneDrive Getting Started dialog that popped up back in Step 3.
  If you somehow closed or can’t get back to this dialog, you can simply launch the OneDrive setup by finding OneDrive in your Windows 7 Start Menu.
To do this, click the Start icon and type OneDrive into the Start Menu search dialog, and click Microsoft OneDrive once you see it in the search results. 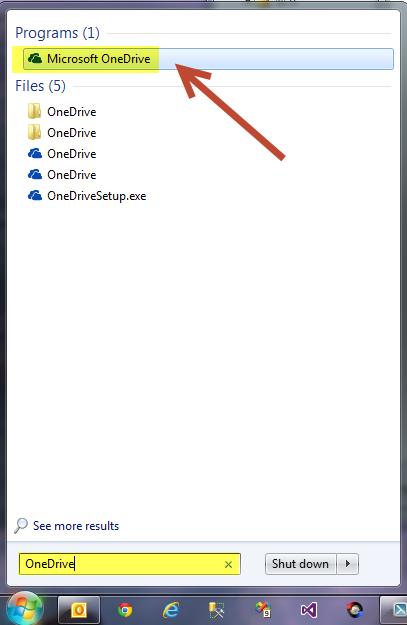 Sign in to your Microsoft account to get started with your Microsoft OneDrive setup.
 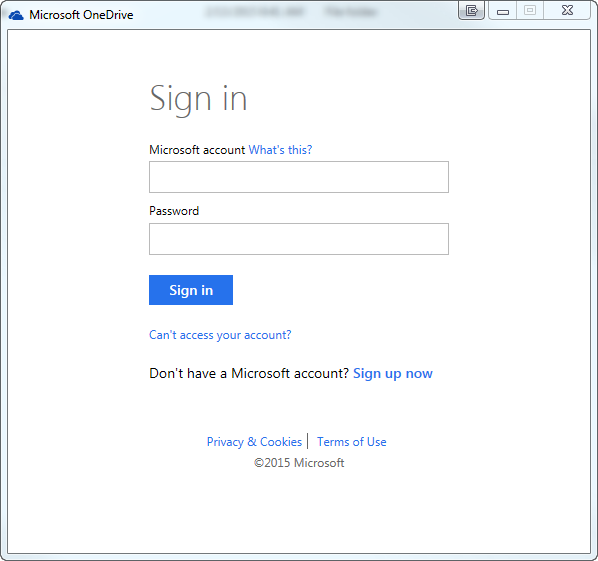 Step 6: After signing in, you will be presented with the Introducing your OneDrive folder dialog.
From here, click Change to modify the default installation location.  Step 7: Select the desired location for your OneDrive folder by browsing with the File Browse dialog.
Find the folder that we relocated in Step 4 and click OK. 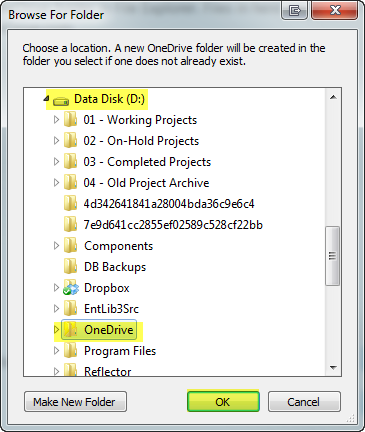 Step 8: Review and confirm that the selected OneDrive folder location that was selected in the previous step and click Next to proceed with the setup.
 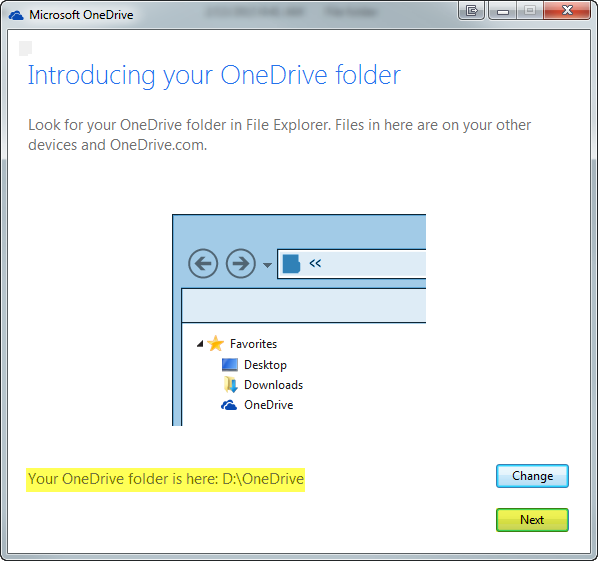 Step 9: Because we moved the old folder and all of the folder contents, the Microsoft OneDrive setup process will present a confirmation dialog indicating that files already exist in this OneDrive folder.
Click the Use this location button to proceed with the installation since we’re aware of this and fine with the fact that these files will be merged with our OneDrive. 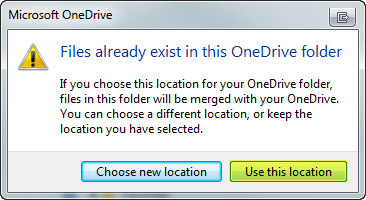 Step 10:
Finally, choose if you want to sync all of the files in your OneDrive on the local Windows 7 system, or if you want to pick and choose the folders that you wish to sync.
Personally, I opted to sync All files and folders on my OneDrive.
Once you have made your decision, click Next to complete the installation. 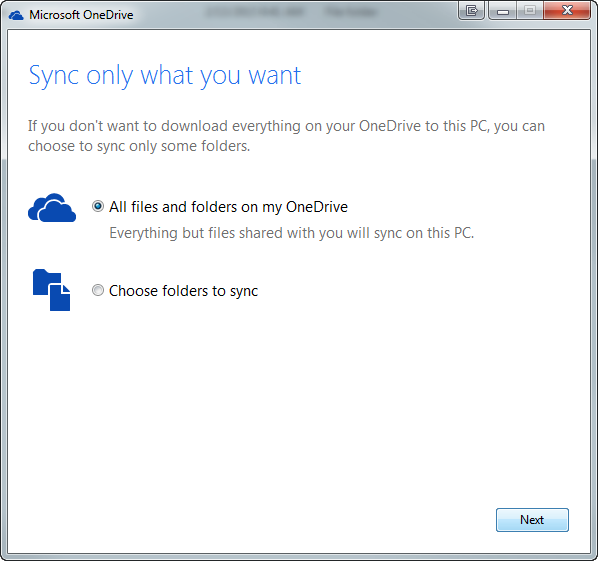 All Done! At this point you will have successfully moved your local Microsoft OneDrive folder from its original location to a new location of your choice.
Since we moved the original folder rather than creating a new empty folder on the new drive, the sync process between Microsoft OneDrive and your local folder should be minimal.
Enjoy!